Friday, April 26, 2019

PandaHall Ideal on Making Blue Crackle Bracelets


This set of bracelets is eye-catching with their shinny appearance. It is made by crackle beads and shell pendants, star pendants and many other brass charms. I really love them. Let us learn how to make them!

To make this beautiful bracelet, you should prepare some crackle glass beads and bracelet pendants first. Thejewelry making process is simple and it will cost you no more than one hour. Maybe it is time for you to spend an afternoon to do a jewelry making.


The materials needed in this jewelry making:
Round Transparent Crackle Glass Beads, 10mm
Dyed Faceted Glass Beads, Pale Turquoise, 6x4mm
Iron Round Spacer Beads, 5mm
Brass Rhinestone Spacer Beads, 7x3.3mm
Tibetan Silver Pendants, Shell, Golden, 11.8x14x2.8mm
Brass Charms, Flat Round with Starfish, 13.5x11x1mm
Brass Pendants, Dolphin, 11x6x2mm
Nylon Wire, Clear, 0.3mm


The steps of making this attractive bracelets:
1. Take out 20-25cm wire, 17 crackle blue glass beads, 2 brass rhinestone spacer beads. Thread them on the wire. Tie the wire and cut down the rest.
2. Take out 2 brass pendants with starfish, 1 shell pendant. Add them on the bracelet symmetrically.
3. Make another bracelet. Thread 6 dyed glass beads and 1 gold spacer bead. Then thread 7 dyed glass beads and 1 gold spacer bead. Repeat it for 3 times. And tie the wire tightly, cut down the rest wire if it is too long.
4. The bracelet will have 5 gold spacer beads now. Add 1 brass pendant with dolphin in the center of the bracelet, where is between the 6 dyed glass beads.


Here is the final look of the bracelets. Actually, you will get two bracelets. But the design is to put them on at one time. Of course, you can match them as you like.

Thursday, April 25, 2019

Beebeecraft Guides on make your own Silicone bracelet with easy steps

Summary: When asked what is the most trendy jewelry ornaments around the wrist, that must be the stylish Silicone bracelet. All of the men, women and even kids are going crazy over it and now it is the time to make your own Silicone bracelet!
Does your inner heart is crying out for the showcase of statement? Here, the chances are the bright, colorful and comfortable Silicone bracelet. Though it has been in fashion for decades, it feels like that it just become popular overnight and will famous forever. Though it can be easily found in the stores, try making your own Silicone bracelet is a surefire way to express your desires fully. Thus, just follow the article and start one if you would like to!

Scissors
How to make your own Silicone bracelet:
Step1: prepare a blank bracelet
Order a blank bracelet and cut open it. Choose a pure color one may be a little smart.
Step2: gather the needed metal findings for Silicone bracelet
According to the width of blank bracelet you choose, gather the necessary metal findings for your bracelet.
Step3: string on the metal findings as picture show
String the well-prepared findings one by one.
Step4: attach on the clasp
In the end, add on the assorted clasps on both ends of your Silicone bracelet.
Got your Silicone bracelet now? Dose it merely a strand of bracelet now? No! It looks like a personalized watch rather than an ordinary bracelet now. Wanna make your own Silicone bracelet into more other unique types, try more bold match ways you never though before.

Beebeecraft jewelry fascinating silver earrings

Summary: This time I practice a way about making silver earrings; accurately this Beebeecraft tutorial is about how to make silver wire earrings, including the commonly seen hoop silver earrings.
In accordance with previous experiences, wired silver earrings are relatively more feasible than welded ones; for the average-level homemade jewelry, welding-processed silver earrings are always requiring complicated equipment, which are more suitable for professionals; therefore, this tutorial is especially prepared for common jewelry makers, introducing easy way about making silver earrings.
When you are making silver earrings, you will need things as below shows:
18 gauged silver wires earring settings
Mandrel
Jewelry making tools Pliers
Wire cutter
Tumbler
Hammer
Block bench
Charms and beads for option.
Now you are making silver earrings!
Step 1: shape the silver wire
Snip two pieces of silver wires, and their lengths are in line with your design about the hoop size; then loop them around mandrel respectively;


Step 2: make the ends of silver earrings
After looping, the ends of a silver earing must be overlapped; first, erect one end of the silver earring, making it a right angle against the hoop; second, loop the other end around the erect end, which act as a flexible closure;

Step 3: end the silver earrings
Leave about 1 cm for erect end and cut off the excess wires; and shape the hoop again on block bench, sand the cutting edge and finally soak the silver earrings in tumbler for shining again.

Here the tutorial about making silver earrings is done; look at your new creation, the beautiful silver hoop earrings; in addition, if you like any decoration, you can add, but you’d better pay attention to the color scheme, for silver earrings, similar colors are much fitting.

Beebeecraft Tips for “where can I buy beads to make jewelry”

Summary: As for some novices’ question like where can I buy beads to make jewelry, I will introduce you several useful and flexible way to get jewelry craft materials and jewelry tool supplies in this tutorial.
I know some of you may first time know about jewelry making; as a professional one in amateur jewelry making world, I am obliged to let you know some basic things about jewelry making; previously I have informed you of the Pandahall Elite beads and kits for jewelry making; if I were you, I may wonder where can I buy beads to make jewelry. So this article is just about to answer the question.
Tip 1: go to flea market
There must have many jewelry making fans like you in your neighborhoods and community; when in leisure time, go to local flea market, and you will find some beautiful beads in amazing price.


Tip 2: search online 
If you often linger around in jewelry making BBS and forums, you may find a lot of ads about beads and tools marketing. Suppose you are not sure about these ads credit, you can just direct to well-known online beads stores, like Beebeecraft, ebay and many more.
Tip 3: mind surroundings
Once you went to beach, you could collect beautifully carved pebbles, shells and even sea glass, all of which are splendid materials for jewelry making; someday if you go to camp or just picnic, mind your surroundings, there might be some dried seeds, which are natural beads for jewelry making; so keep on sharp eyes on your common life; you needn’t wonder “where can I buy beads to make jewelry”, because the nature presents you the best.

Till here the tutorial about where can I buy beads to make jewelry is over; I hope the 3 tips listed could inspire you and spark more fascinating ideas from you.

Beebeecraft clip on earrings - a pair of “butterfly loves flower” earrings

Summary: This time I work out a new tutorial which will tell you how to make your own clip on earrings; this tutorial is full of sincerity, as the instructions are made of simple and understandable words and clear photos for every step.
No matter in working place or at entertainment occasions, you, as one member of females, would like to use jewelry to adorn yourself, for example, you might prefer to wear earrings to embellish an overall appearance; however, the problem floats up: you don’t have ear holes; do you have to pierce your ears to enjoy the beauty of earrings? No, just follow this tutorial, you can make your own clip on earrings; then can wear clip on earrings without any obstacle.
The materials and tools you need to make your own clip on earrings are:
Clip on earring hooks
Butterfly and flower charm beads
Jump rings
Jewelry tool supplies Pliers and wire cutter


Instructions start from here:
Step 1: make the dangle part of clip on earrings
First, Consider the design and color match details of your clip on earrings;
Second, upon your design, align them on working table;
Third, with pliers, open a jump ring and combine butterfly charm with flower charm;

Step 2: assemble dangle part onto ear hook
First, pick out the prepared clip on ear hook, and open a jump ring, and then slide it through both loops respectively on ear hook and butterfly charm; close up the jump ring.

Step 3: finish the clip on earrings
Repeat the above two steps and make the other one.

Till here the tutorial is over; do you think it is simple and useful? Now you can start to make your own clip on earrings. Once you are adept at making clip on earrings, you can create some new and novel pairs to send them as gifts to your friends.

Beebeecraft tutorials on How to Make a Horseshoe Nail Cross Necklace

Summary: It is an easy-to-learn tutorial about how to make a horseshoe nail cross necklace; it is said that horseshoe nail cross is just the perfect choice for necklace pendant, so don’t you want to make one?
No matter in school craft class or for festival celebration decorating, horseshoe nail cross is always the jewelry findings chosen by most craft fans; it is simple to create and always outstanding among other pendant jewelry, and full of distinctive temperament; therefore I am self-assured about my tutorial of how to make a horseshoe nail cross necklace, just take out hands to make the rustic style decorating.
The materials and tools for this rustic style decorating:
Horseshoe nails
Leather cord
Super glues
Scissors
Jewelry tool supplies Pliers

The instructions about how to make a horseshoe nail cross necklace:
Step 1: prepare horseshoe nails
First, Pick up 3 nails in fine quality; you need to examine whether there is any rusty flaw on nail surfaces; if it is, you’d better replace them;
Second, use pliers to bend the tip ends of 2 nails to the same degree; and loop the top end of the 3rd nail; align them on table;
Step 2: wrap the nails and make cross
Snip a proper length of leather cord and wrap it around the part where your nails meet together; at last wrap, pull the cord tight and make a firm knot there. If necessary, you can use some glue to secure the conjunction part.
Step 3: finish the horseshoe nail cross necklace
Snip another piece of leather cord, and thread it through your cross pendant, so the necklace is done.

The only problem related to this how to make a horseshoe nail cross necklace is where to buy the horseshoe nails; I suggest you to go to hardware and craft stores, there must be enough horseshoe nails and you have the opportunities to pick up the favorite ones. The rustic style decorating may be simulated at appearance by other metal cross necklace, but will not be emulated at intrinsic quality.

Learn from Beebeecraft How to make a wooden cross necklace

Summary: This tutorial is to tutor you how to make a wooden cross necklace in 3 simple steps; in addition, I will provide you with some practical information such as how to buy wood nut beads wholesale, which can help you a lot in this project and others as well.
Today, in how to make a wooden cross necklace tutorial, I focus on the necklace making, rather than woodshop crafts, therefore the cross pendant used will be ready-made and accessible by anyone. As for beads, I will suggest you some way about how to buy beads wholesale.

The materials and tools you use in how to make a wooden cross necklace

Wooden cross pendant
jewelry bails
Black beads
Jewelry making tools Pliers

Full instructions

Step 1: prepare the wooden cross pendant

If you don’t purchase pendant from craft store, you can also make one by yourself; however, the equipment like handsaw, drilling machine and wood glue would be in need for this project; if use these tools, beware of any danger that may happen!
Step 2: make beaded chain
First, know how to buy beads wholesale; my suggestion is to search some big jewelry supplies web stores;
Second, get comments about the selected web stores from bead forum friends by a poll post or personal message;
Third, contact their CSR by emails and gain what information you want; and even the price you can discuss with them; finally you will harvest the experience how to buy beads wholesale.
Fourth, thread the beads onto wire and make the bead chain;

Step 3: finish the cross pendant necklace

Attach pendant to bead chain with a pinch bail.

Now this tutorial concludes here; I hope through this tutorial, you can not only master the methods about how to make a wooden cross necklace, but also handle the way regarding how to buy beads wholesale.

Beebeecraft Tips for where to buy beads to make jewelry

Summary: This tutorial is for novices who have asked question like where to buy beads to make jewelry and where to buy beads wholesale; so our focus will be on the answers to the questions.
These days free craft courses get popular and attract many novices into the field; however some of them though love to be engaged in craft lessons, don’t know the way to collect jewelry craft materials; when diving in some craft forums, many tyros are swarming to ask a same question: where to buy jewelry beads to make jewelry?
We can analyze the question into two parts, one is where to buy beads wholesale, and the other is where to buy beads distinguished from others.
1. Where to buy beads wholesale
Go to online jewelry stores, you will find the beads in these web stores are in large quantity and full categories, such as glass pearl beads, crystal glass beads, gemstone beads etc, and especially in wholesale prices. In these stores, you can select your favorite beads in whatever time; particularly there won’t be over-enthusiastic salesperson to disturb you. In addition, such kind of stores is always being in discount, even some items are free shipping for you new comers meanwhile.

2. Where to buy beads distinguished from others

Although the beads stock in web stores can to a large extent solve the problem where to buy beads wholesale, for some special craft inspiration projects, you may be in want of some beads and findings different from the commonly seen ones, which can give your work a last punch line; so we suggest you to wander around some old things market, hardware shop and even antique market.
After the two tips, we guarantee you will clearly know how to buy beads to make jewelry; for more interesting and useful tutorials, thanks to station in our learning center block.

Beebeecraft Top ten valentines day gifts- useful tips from professionals

Summary: Don’t have valentines day gifts ideas? Why not follow our tip of Pandahall Elite top ten valentines day gifts, it will guide you to prepare right gifts with simple jewelry craft supplies to please your girlfriend.
Many of you may have been incubating dozens of valentines day gift ideas to surprise your girlfriend, and considering these ideas will help you enhance the self-position in this relationship. So the valentines day is a D day and you never want to make any mistakes; but if you don’t read the Beebeecraft “top ten valentines day gifts”, you will probably make mistakes despite how carefully you prepare the gifts.


Top 1: spa / massage service
Buy your girlfriend a spa card or massage card in order to compensate the hardness and exhaustion she have gone through all the year, especially the efforts she made for this relationship. Providing such kind of service is also a way to express your love and thanks.
Top 2: fashion magazines she loves most
Subscribe her favorite fashion magazine; women who love clothing, shoes, bags and various accessories often think they have a very acute sense of fashion and trendies, so your girlfriend must love to browse fashion magazines and always keep eye on current fashion items.


Top 3: cashmere gloves
Present her warm and finely made gloves; she will think you are always keep her in mind and care about her cold hands.
Top 4: coffee table book
Give coffee table book to her; select a delicate coffee table book with a strong romantic atmosphere, and the subject should be her favorite.


Top 5: dinner in a fine restaurant
Treat her in her favorite restaurant; before her arrival, prepare something special, for example, fair-sounding music.


Top 6: love letter
Handwrite a love letter to her; love letter is and will be never out of fashion, just write down the heartfelt words.
Top 7: event ticket
Choose event tickets she favors most and company her all the way to the event.
Top 8: fine jewelry
Buy her quality/ big branded jewelry, she deserves it; if you want the gift more special, buy high quality materials and handmake one all by yourdelf; I bet she will be moved.


Top 9: month club membership
Get to know her recent hobby and sign her up in related month club, helping her enjoy her favorite things.

Top 10: creativeness
Find something new to send her or create something for her; it is not waste of time to think about her likings, exert your originality to carter to her pleasure.
Above are top ten valentines day gifts you can prepare for your girlfriend. As the 10th valentines day gift idea shows originality and creativeness are bonus points for your gift; if you want to succeed, another thins should be always on your mind- show your sincerity.

Beebeecraft Tips for cheap valentines day decorations

Summary: This Beebeecraft tutorial aims to inform you of several useful things regarding cheap valentine day decorations; out of the decorations you can even make cute diy jewelry.
You need to decorate your love house on this special day, don’t you? but considering current financial status, you can hardly afford the exquisite but expensive valentine jewelry craft supplies; must it be a destiny to give up your wish? I recommend several cheap valentines day decorations, which can also be used to make cute diy jewelry.
1. Heart banner
If you prepare valentine party for crowds of friends, heart banner is an appropriate decoration to glamorize the holiday atmosphere! Furthermore, it is cheap to make, but never cheap to look.
How to make it?
First, cut out heart shapes from valentine themed prints;
Second, cut each letter of your message out of colored cards;
Third, make hole for each heart and thread them with ribbon, u can also add some glass pearl beads;
At last, make many and hang them where you want to decorate in the room


2. Conversation heart bottle
It is an awesome idea to bottle conversation heart candies into apothecary jar; these jars are also nice-looking and cheap valentines day decorations. If changing jar into tiny drift bottle, this deco can be turned into cute diy jewelry .


3. Ribbon rose
I have uploaded ribbon hair pieces tutorial before; if you have learnt that, this kind of decorations is just piece of cake for you. regular ribbons after handled can be upcycled into ornate roses. With the skill, you can create more cute diy jewelry.


There will be more fancy ideas about cheap valentines day decorations; I hope the tips and other information from web can activate your potentiality of art and sparkle more cute diy jewelry ideas from yourself.

Learn from Beebeecraft How to make porcupine quill earrings- native Indians’ favorite craftworks

Summary: Porcupine quill earrings, the best seller in native Indians jewelry field,; our how to make porcupine quill earrings tutorial is going to teach you a common way about it.
Last week, when lurking in some forum, I found a travel journal reading the craft business story of a Japanese couple. The couple when first set foot in United State, knew nothing about this country, later they had no job, so no income; luckily some native Indians taught them porcupine quill handcrafts when they resided in a small village; after that while, they started handcraft business, and now the store still runs well. This story sparks me to make a tutorial about how to make porcupine quill earrings.

Materials and tools:
Porcupine quills (dyed or not)
Earring hooks
Head pins
Jump rings
Beads
Jewelry making tools Pliers
Needle
Instructions:


Step 1: prepare quills for beadwork
1st, use needle to go through your desired porcupine quills and trim off the barbs.
2nd, dye them if necessary.
Step 2: add beads to make dangles
Thread spacers, quill and other beads as per your design, so the dangling part is done.
Step 3: end up the earrings
Use jump ring to combine dangle and ear hook together.
In addition, you can also utilize the quills to make simple traditional hairpins.

So far the tutorial of how to make porcupine quill earrings is finished here; although there are impossibly native Indians residing around you and become your porky crafts teacher, you can make full use of internet and experiment by yourself to make some fab items, which is much more practical.

PandaHall Ideas on Making Star Beaded Earrings

This pair of earring is made by faceted cubic zironia beads, pearl beads and sliver seed beads. The design is original and make them into the shape of stars.
If you love jewelry, you can not miss this jewelry making. The tutorial is simple, and it is suitable for beginners. 

First, you need prepare the materials during this jewelry making.
1. Cubic Zirconia Cabochons, Grade A, Faceted, Diamond, Mixed Color, 4x2.5mm
2. Imitated Pearl Acrylic Beads, Round, White, 3mm, Hole: 1mm
3. Iron Round Spacer Beads, 2~5mm, Hole: 1~1.5mm
4. Iron Jump Rings
5. Earring Jewelry Findings Iron Silver Earring Hooks, Size: about 18mm long, 18mm wide, 0.8mm thick, hole: 2mm
6. Fishing Thread Nylon Wire, White, 0.2mm


Next, you can start making this earring by the help of instruction or leading pictures.
1. Thread 12 round spacer beads and one Cubic Zirconia Cabochon. Make the spacers beads around the Cubic Zirconia Cabochon.
2. Then thread 12 pearl acrylic beads around the jewelry.
3. Another 12 pearl acrylic beads threaded again. Every two pearl beads is a set as the picture shows.
4. Add 6 pearl beads on the 6 top of the jewelry. And you will get a Hexagonal star.
5. Add a jump ring and connect the earring hook.


Then, the final result is here.

Wednesday, April 24, 2019

PandaHall Ideal on Simple Earring Loop

Summary: Round environmental glass beads accompanied with the square golden brass links composed this pair of earrings. Bright red and shinny gold are perfectly matched. 


Good project of jewelry making. You will get a pair of pretty summer earrings.
Materials you will need:
1. Square Brass Linking Rings, Golden, 20x20x1.2mm
2. Environmental Dyed Glass Pearl Bead Strands, Round, Cotton Cord Threaded, Crimson, 5mm, Hole: 1.2~1.5mm
3. Iron Cable Chains, Unwelded, with Spool, Popular for Jewelry Making, Important Decoration, Cadmium Free & Nickel Free & Lead Free, Golden, 3x2x0.6mm
4. Iron Jump Rings, Close but Unsoldered, Mixed Size, Golden, 4~10x0.7~1mm
5. Brass Screw Clip Earring Converter, for Non-pierced Ears, Mixed Color, 17x13.5x5mm, Hole: 1.2mm
6. Iron Head pins, Golden, 35x0.7mm
7. Pliers


Main steps you can follow:
1. Thread two red glass pearl beads on the head pins and bend the top point of the head pins.
2. Add the red glass beads and square brass linking rings on the cheap iron chains.
3. Add the earring converters.


This is a pair of simple earrings. It is easy to make, and it will not cost you too many time. So lets do it if you love it.

Tuesday, April 23, 2019

Good Project of Paper Hair Accessories for Kid’s Craft

Summary: This jewelry set are made by non woven fabric embroidery materials. If you want to try something new, this will be a good choice. You can do this jewelry making with your little kids.

What you need are some felt cloth and glass pearl beads and you can can get a set of hair accessories. But many tools may be used like sewing needles, scissor, jewelry pliers and glue gun.

The materials may be needed during this jewelry making:
1. Non Woven Fabric Embroidery Needle Felt for DIY Crafts, Square, Lemon Chiffon; Blue and Green.
2. Glass Pearl Beads Strands, Penalized, Round, White, Size: about 4mm in diameter, hole: 0.8~1mm.
3. Earring Jewelry Findings Iron Silver Earring Hooks, Size: about 18mm long, 18mm wide, 0.8mm thick, hole: 2mm
4. Nylon Sewing Thread, White, 0.2mm
Tools:
Sewing needle
Iron scissor
Flat nose pliers
Glue gun

The main steps of jewelry making:
1. Cut the felt cloth into the shape of flowers. And cut about 15 flowers. At the same time, cut four green leaves and some strips. If you are worried about cutting wrong, you can draw the shapes on the cloth first and cut them alongside the lines.
2. Sew the pearl beads on the flower cloth.
3. Glue the flowers and leaves on the strips. The shape of strips is the same of your hair accessories.
4. At last, glue the cloth accessories on the hair clips. You can also make some other jewelries like paper earrings.

It is not like the crystal jewelry which is shinny and expensive, but this kind of hair accessories will be full of memory and joy. You can do this jewelry making with you family or little girls. And i believe that you will be happy with each other.

PandaHall Tutorials on How to Make Green Crystal Bracelet

Summary: This is a muti-strand bracelet made by green crystal beads and pearl beads. Two strands beads are different from each other. That is very special and unique and the design is our original ideal. If you love jewelry making, follow us. If you want to learn some skills or just want to kill time, follow us!


First, you need prepare all the materials of this jewelry making in advance. What you need are as the picture shows:
1. Glass Bead Strands, Crystal Bead Strands, Faceted, Oval, Teal, 16x13x7mm, Hole: 1mm;
2. Imitate Austrian Crystal Bicone Glass Beads Strands, Grade AA, Faceted, Dark Cyan, 6x6mm, Hole: 1mm;
3. Dyed Glass Pearl Beads Strands, Round, with Cotton Thread, Lead Free & Nickel Free & Cadmium Free, Old Lace, 6mm, Hole: 1mm;
4. 304 Stainless Steel Jump Rings, Open Jump Rings, Stainless Steel Color, 10x1.4mm; Inner Diameter: 7mm;
5. Tibetan Silver Flower Daisy Spacers Beads, Antique Silver, Lead Free & Cadmium Free & Nickel Free; 4x1.5mm, Hole: 1mm;
6. Mix Iron Eye Pin, Silver Color, about 1.6cm-5.0cm long, 0.7mm thick;
7. Pliers


Then, you can follow the instructions to make this bracelet or look at the pictures.
1. Thread three big blue glass beads and many small beads with the eye pins. The small beads include pearl beads and crystal glass beads.
2. Thread two crystal glass beads and one pearl bead together. Use the spacer beads to separate them.
3. Use the pliers to bend the eye pins and make those parts into the shape as in the pictures.
4. Connect all the beads. One strand is composed by big glass beads and small crystal glass beads. Another strand is composed by crystal beads and pearl beads and they are connected by the jump rings.
5. When the two bracelet strands are finished, put them together on two jump rings. And add the claw lobster. The muti-strand bracelet is finished.


During the jewelry making, your patience will be very important. And you should not lose your patience and temper when you can not cope with those beads. I believe that you will get a pretty bracelet. Let’s do it!

Friday, April 19, 2019

PandaHall Tutorials on Simple Bracelet with Cute Beads

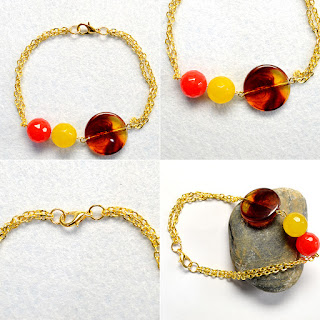
What i want to share today is a simple bracelet with cute acrylic beads. Nuggets imitation gemstone acrylic beads and gold chains compose the major of this bracelet. Simple but special. If you have a free weekends and have no plans to do, this maybe a good plan you can have a try.

This jewelry tutorial will divide into two main parts. One part is about the materials and tools you will need in this jewelry making. And the second part is about the instructions of jewelry tutorial.


Now, the first part: materials and tools
Flat Round Imitation Gemstone Acrylic Beads, Chocolate, 22x8.5mm, Hole: 2mm;
Nuggets Imitation Gemstone Acrylic Beads, Mixed Color, 25x24x17mm, Hole: 3mm;
Stainless steel chains, golden, 3x2x0.6mm;
Jewelry Findings, Iron Eye Pin, Golden, 45x0.7mm;
304 Stainless Steel Open Jump Rings, Golden, 6x0.8mm; Inner Diameter: about 4.5mm;
Zinc Alloy Jewelry Findings Golden Lobster Claw Clasps, 12x6mm, Hole: 1.2mm;
Needle Nose Pliers;
Round Nose Pliers;
Flat Nose Pliers;


Then, the second part: instructions
1. Take out one flat round imitation gemstone acrylic bead, chocolate; two nuggets acrylic beads, mixed colors; two iron eye pins.
2. Thread the beads one by one. Make the small two acrylic beads threaded on one eye pin. And bend the top wire of the eye pins.
3. Add the beads together and put on four stainless steel chains in the two sides of the beads.
4. Finally, add the jump rings and lobster claw clasps.


Here is the final look of the bracelet. Do you get it?

Beebeecraft Tips for how to make magnetic earrings look real

Summary: Wearing magnetic earrings you needn’t experience the pains from pierced ears. Our tutorial is to inform you practical tips about how to make magnetic earrings look real.
You want to pierce ears for jewelry wearing? Yes, most of you are eager to wear earrings to adorn yourself and show off the beauty, but the pain of piercing is a huge obstacle which gets you cringed! Maybe you are too young or too old to be allowed to get ears pierced. So magnetic earrings are a better choice, and this tutorial is to tell you how to make magnetic earrings look real ones.

Never touch or pull hard on them
Do not attach heavy and long dangles to your magnetic earrings, and stop others or yourself from touching or pulling them, otherwise they will move, cause pain feelings and even fall.
Fake the back of your magnetic ones
Magnetic earring settings studs have the plain flat round backs that are easily detected by some sharp eyes; so you’d better tear some backs from real earrings and snuggly glue them onto your magnetic ones, which can to a great extent deceive the public and no not need earring hooks.

Cover the magnetic backs and fix the “piercing” place
If your hair’s long enough, use it to naturally cover the magnetic backs, or wear a hood when wearing them; moreover you must fix the places where you wear them, or people will notice they are fake as every time your earrings are in different places.

Some certain cultures, religions or medical ailments, however, may prohibit an individual from piercing ears. Because of individuals, you will discover choices to pierced ears including clip-on earrings, ear cuffs and magnetic jewelry. After referring to Beebeecraft how to make magnetic earrings real tutorial, you will wear them in a very fine way.

Beebeecraft Basic jewelry designs-create your own charm bracelet

Summary: This is a basic jewelry design. It will mainly show you how to create your own charm bracelet using edible candy and jewelry making chain. Super easy and amusing!
If you love eating Lucky Charms cereal, perhaps you’d also love to wear them. The brightly colored candies actually look adorable as charms for special themed jewelry designs, such as a New Year necklace, Christmas bracelet, etc. Here, in this post, I will show you how to create your own charm bracelet for a fantastic candy party.


Supplies needed in jewelry designs:
Lucky Charms cereal
Mod Podge Dimensional Magic
String materials crafting wire
Side Cutting Plier
Round Nose Plier jewelry making tools
Chain
Lobster Claw Clasp
Jumpring
Paint Brush
Waxed Paper
Small Plate
Directions on how to create your own charm bracelet:
Step 1: pick out the candy pieces you prefer, all sorts of shape and color.
Step 2: cut segments of 3cm-long jewelry wire. Curve each wire into horseshoe shape around round nose pliers. Then insert the wire into each candy as the picture shows.

Step3: after making 12 or so candy charms, take a piece of waxed paper and then lay out all the charms on the paper and on a small plate.
Slightly paint a thin layer of Mod Podge on top of each candy. Wait for it to dry completely.

Step 4: take the prepared chain strand and hang the candy charms using jumprings on it.
Soon you’ll have your creative charm bracelet finished!
However, if you want to simplify the jewelry designs on how to create your own charm bracelet, try using the pre-made charms out of glass or clay. I recommend you try it out my way. It’s so much more fun and amusing to make it this way!  What do you think??